Spruce up your classroom this year with the Target Dollar Spot. I don't know one educator that can walk past that corner without putting something in their cart. Here are my top 5 Target Dollar Spot Classroom Hacks. Tip #1  I am short on space in my group meeting area. I needed to find a way to hang my ABC picture cards so that we could have them up as we sing and move to our new ABC Song and then move it so that we could use the smart board too.  We used the clothes pin line and strung it across the smart board. We used hooks at the side of the board so that we could unhook the line out of the way when we need to use the smart board. Tip #2 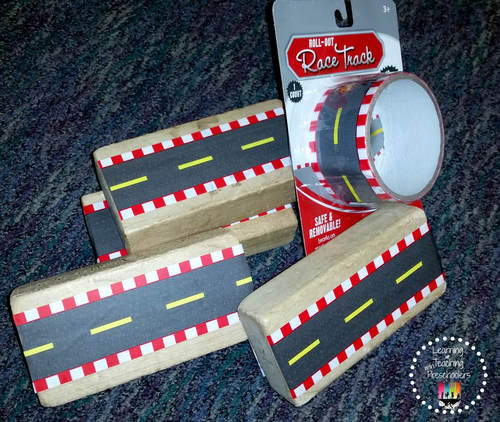 I'm not a big fan of putting tape on my carpets to make roads for the block center. The race track tape is perfect for the children to make their own roads with the block. I placed the tape on blocks and modge podged it on so that the children couldn't pull it off. Tip #3 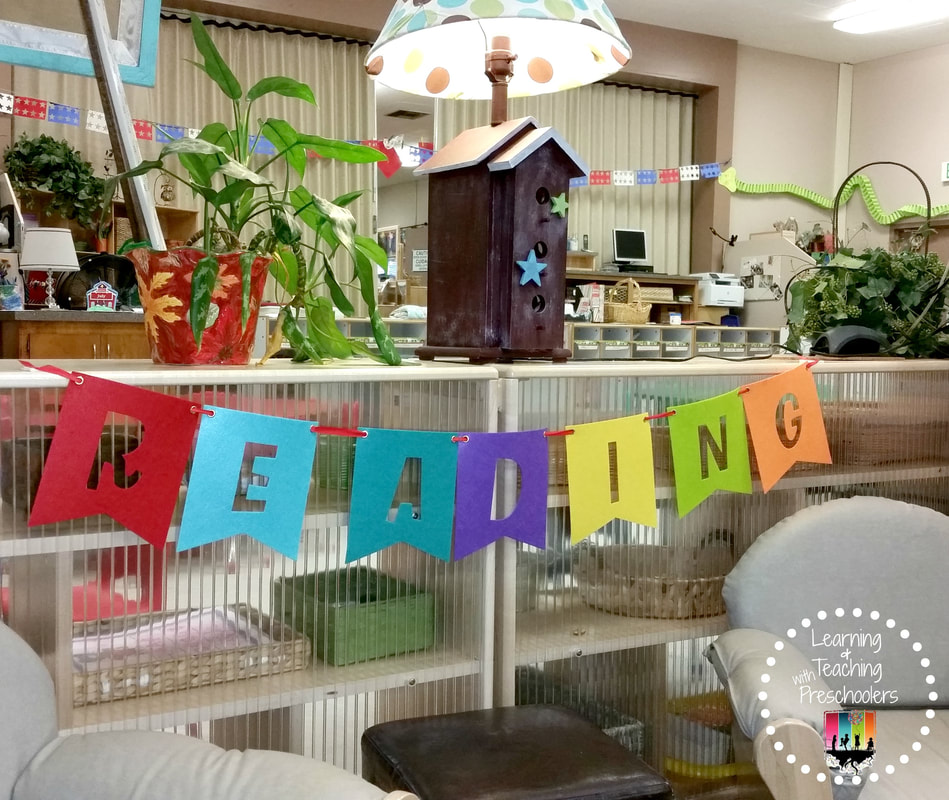 No special reason, just thought it would brighten up the book nook. Tip #4 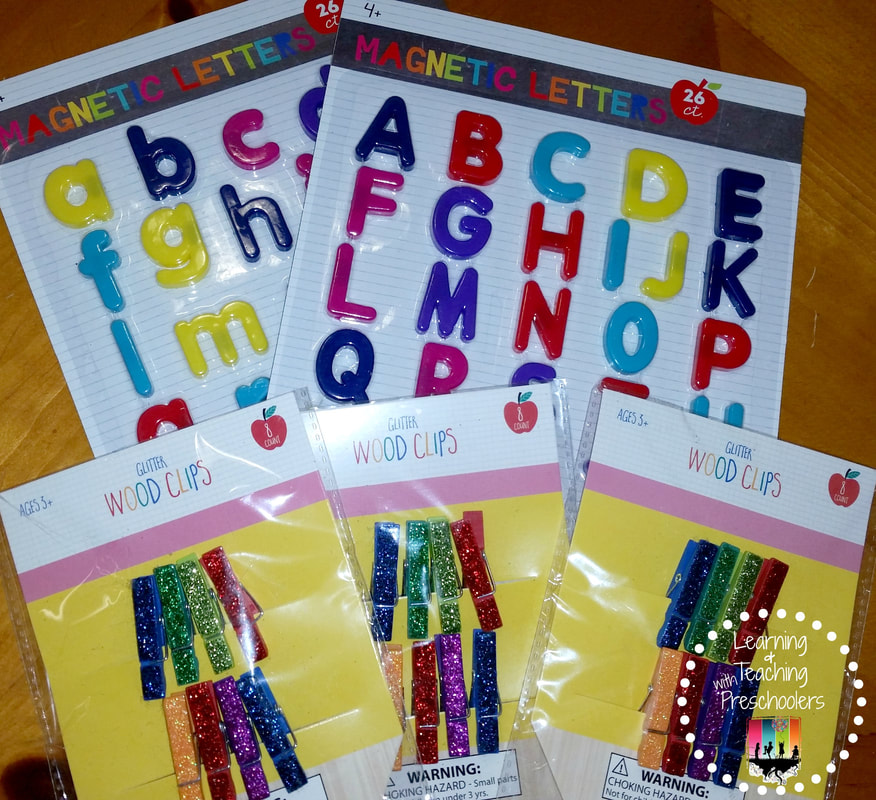 When I saw these I knew that they would work perfectly for my See-Find and Write cards that are located in my writing center. 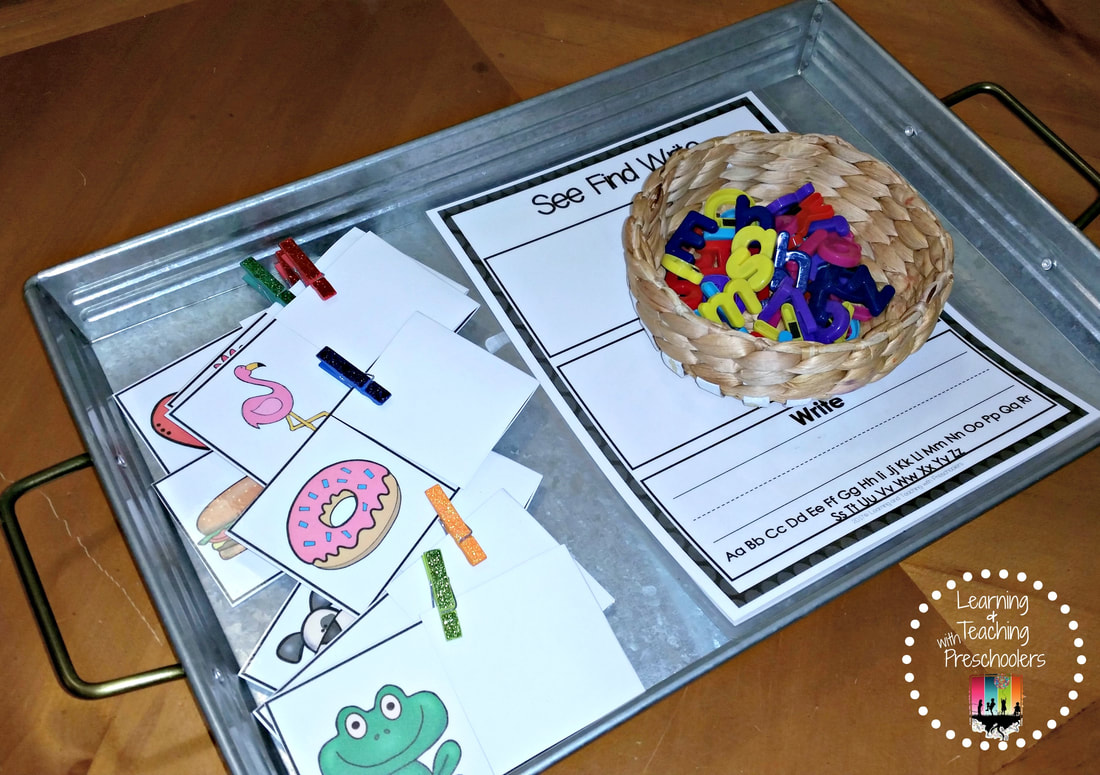 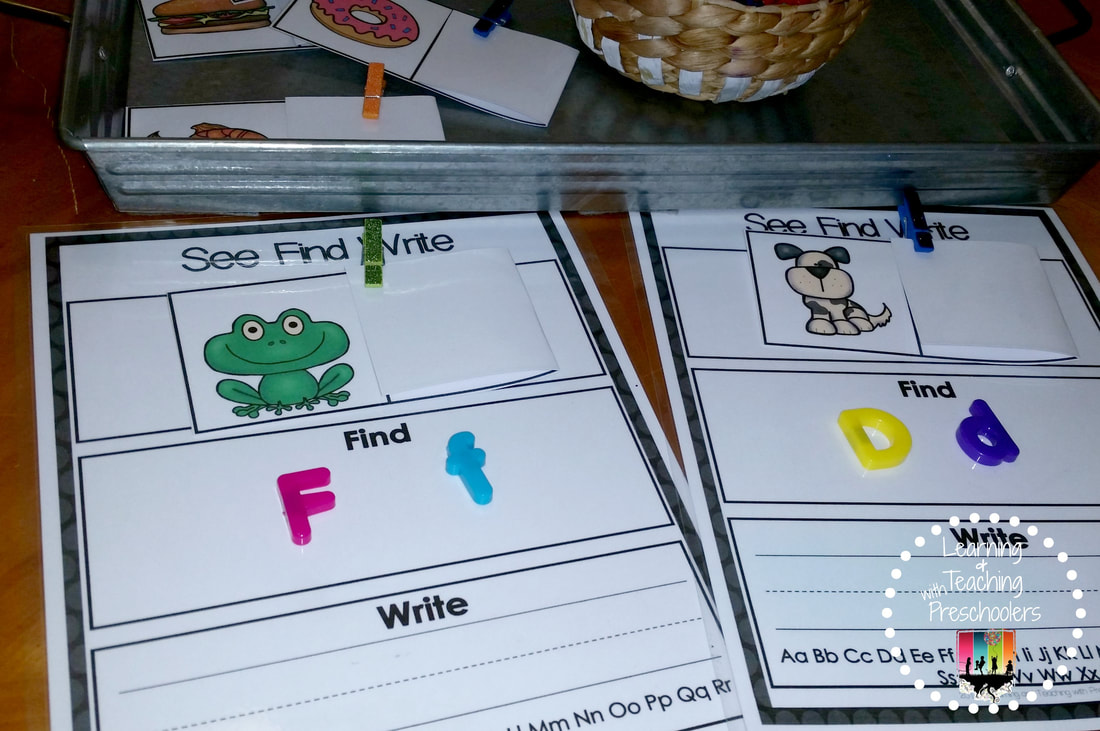 Tip #5   Looking for more way to use the Target Dollar Spot in your classroom? Head on over to Prek Partner and see what Janice has done with all of her finds. Share with us how you are using the Target Dollar Spot in your classroom. 
0 Comments
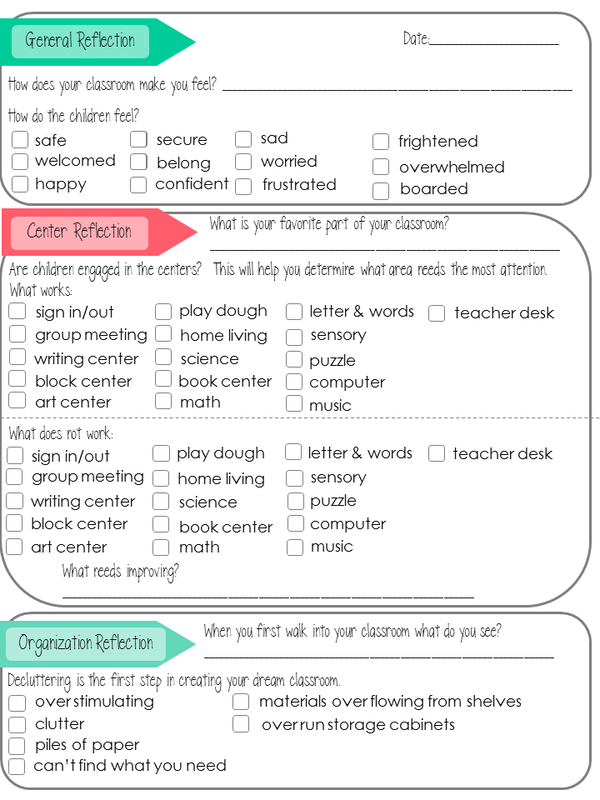
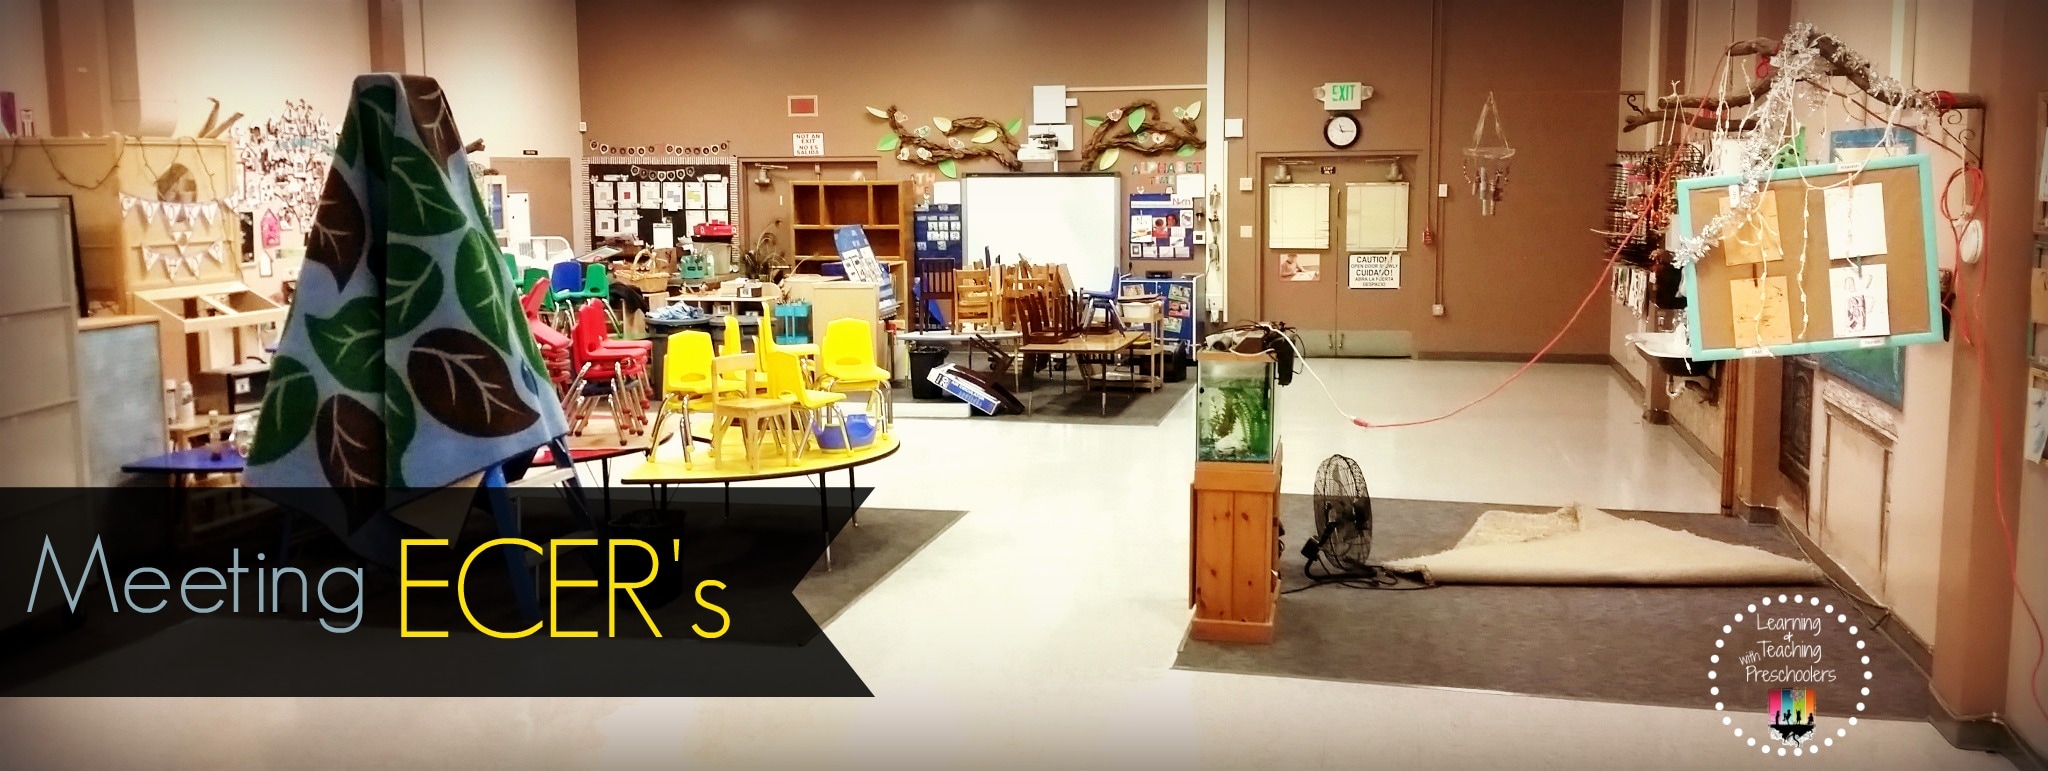 This year as a state funded program we are going through the QRIS (Quality Rating and Improvement System) and with the QRIS comes ECER’s the Environment rating tool. We have always completed an annual self-evaluation of the ECER’s tools, but with the QRIS they keep you accountable for it. You know that they will be randomly coming into the classroom to conduct their own ECER’s and they will find enough stuff on their own without giving them the ones that you already know about. So, now let’s talk turkey. Our self-evaluation of ECER’s where due in December before leaving for winter break. Here is what I discovered about my own ECER’s.
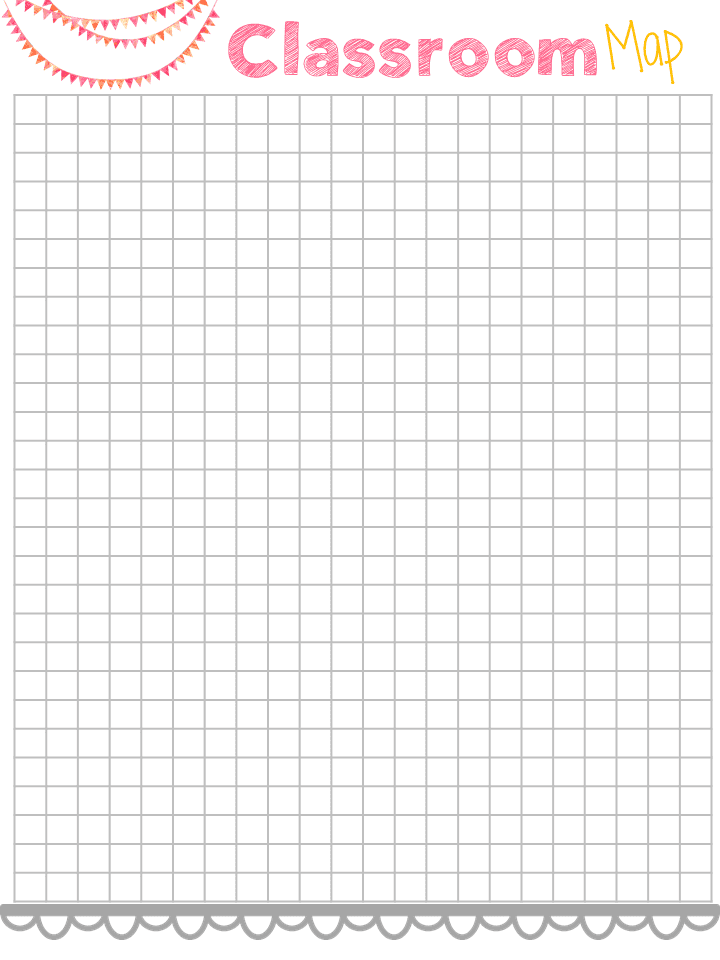
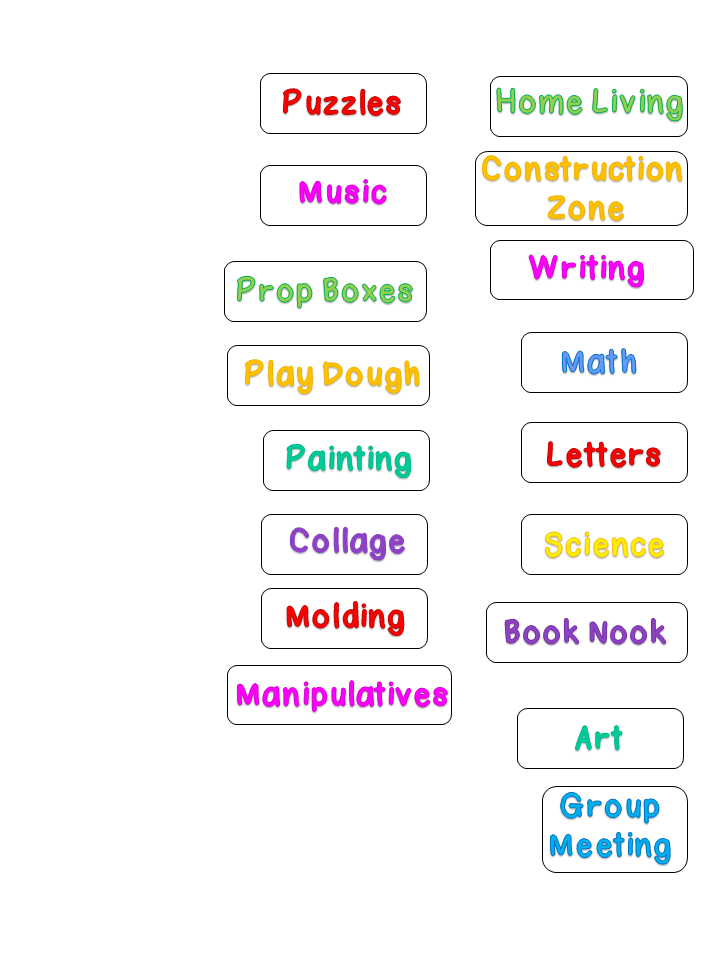
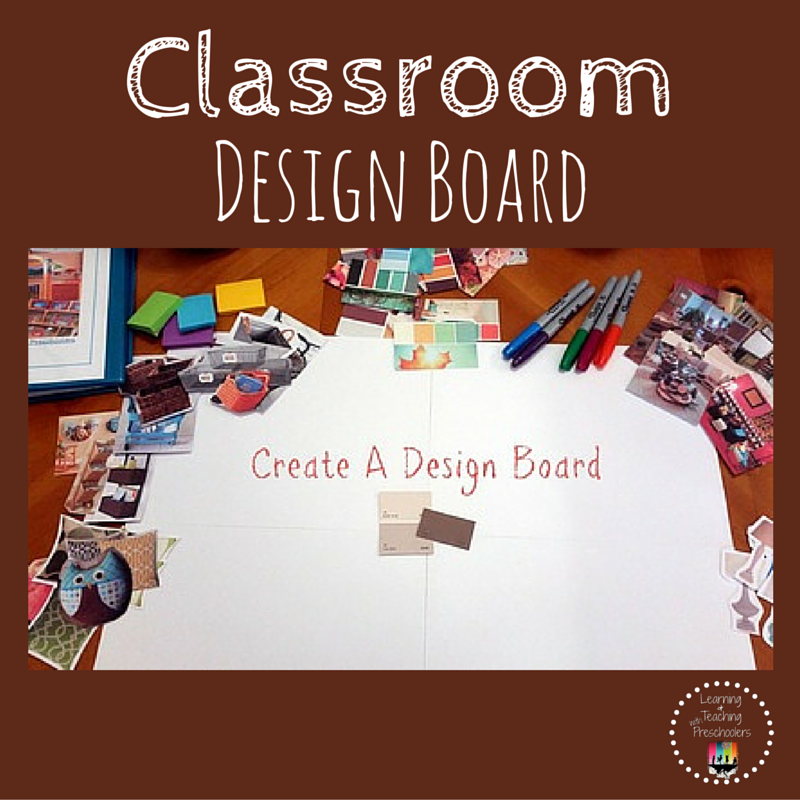
So, if you follow me on Instagram you saw that on December 21, we packed and moved furniture in our classrooms for the annual deep cleaning too. On January 3rd, we are due back in our classroom with kids as we put our classrooms back together. You’re asking yourself right now how are you going to do that? It means I must have a master plan. I need to have a master plan to move furniture, meet ECERS and have my classroom up and running in as sort of time as possible. I do all of this with a classroom design map. This map allows me to move and change things around and move it again until I come up with the perfect arrangement. This will also ensure that I have correct any of my problem areas that I discovered during my ECER’s review. By doing this in advance I will be able to put my room back together in a short amount of time and with little frustration to me, my staff and most of all the children. Here is what it looks like. 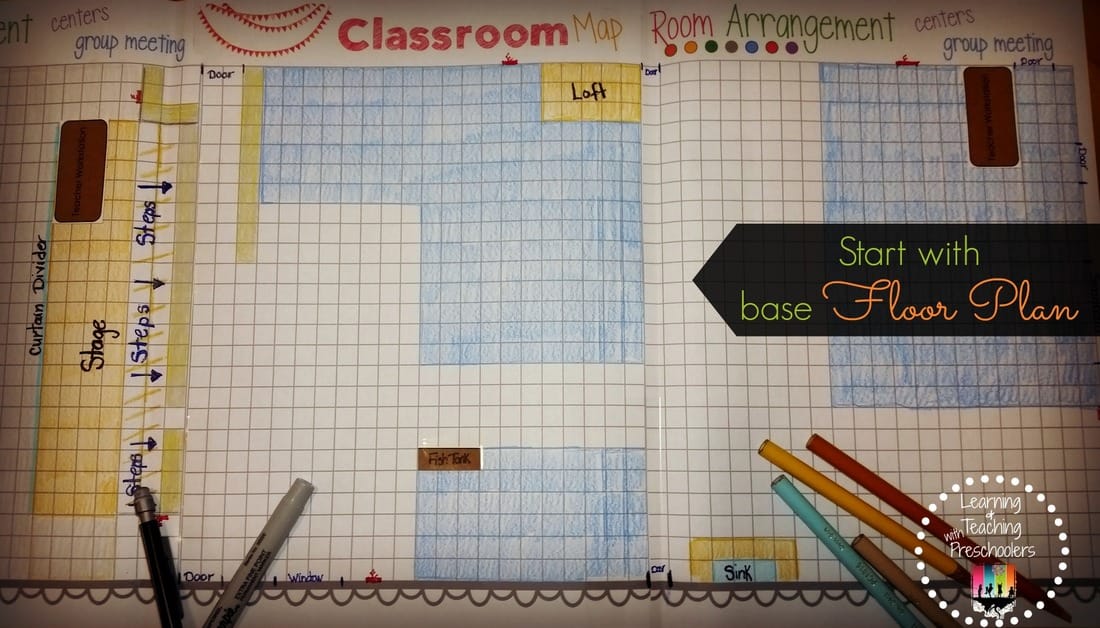 Step One: I start out with my base floor plan. I sketch out on my classroom design map all elements that will never change.
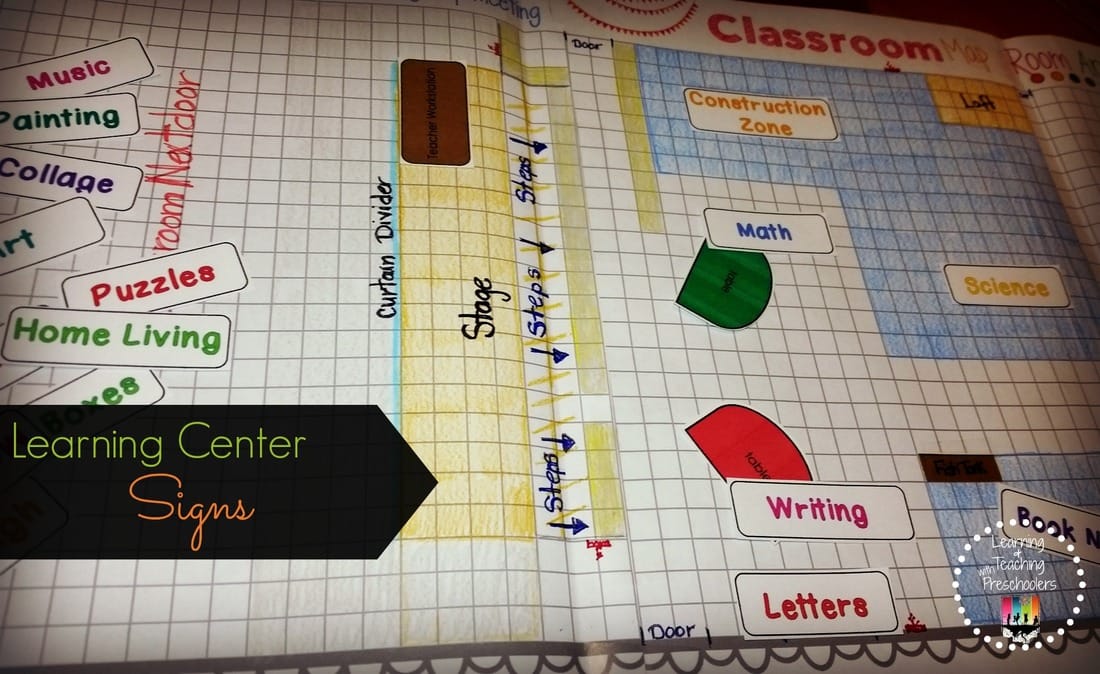 Step Two: I make and cut out area signs for all learning centers that I would like to have in my classroom environment. I do most of my moving around during this part of my planning. Thinking about what I found out about my areas conflicting with one another and making sure that I have the right combinations of centers next to each other. 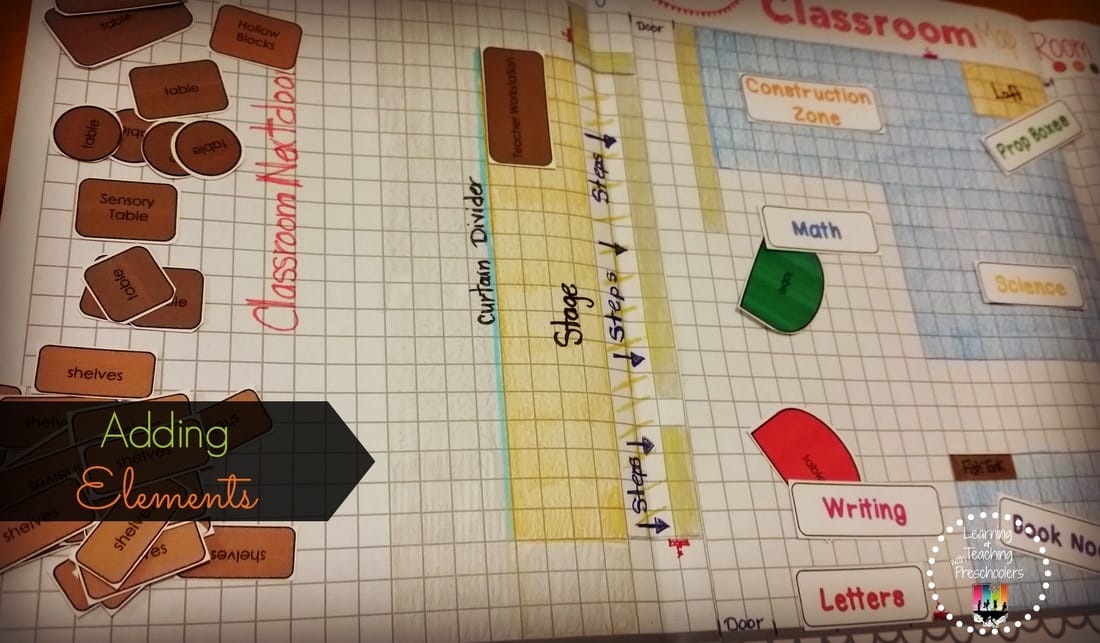 Step Three: I make and cut out pieces of all tables, shelves and area rugs. Now I can add all the furniture to each center. This will show me if areas are too tight with furniture. Not leaving enough room for children to play and interact with the materials. 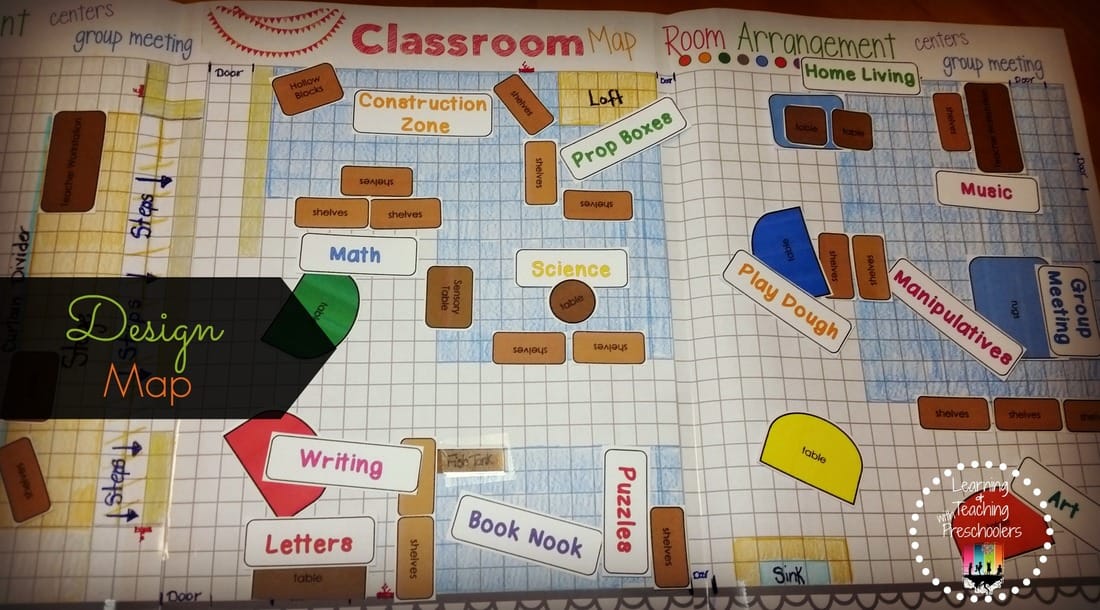 Step Four: Take a close look and ask myself these questions.
Finally: Now that I have everything mapped out I’m ready to take a picture of the map so that I can send it to my staff. This will give them the opportunity to provide feedback before we even step foot into the classroom. Now we are ready for the big move on January 3rd. Looking to redesign your classroom this year? Grab your free classroom design map.
If you are looking for a way to keep up with your classroom design and ECERS. Then look no further, this classroom design workbook will help you keep up with all your ideas and needed materials to meet ECER’s and any other environment rating tool.
 Day Five“An environment which speaks sees and reflects the child as an active and productive person. An environment which is silent seems void of life with no real sense of who plays there.” Loris Malaguzzi When you think of your learning spaces think about how children learn. Children that are actively engaged are learning through play. As we talked about our learning spaces as the third teacher the choices we make about our environment create a link directly to the play and learning in the classroom. Now on to today’s order of business, improving learning spaces. In order for us to improve on our learning spaces we first need to reflect on how children are using our learning spaces. Ask yourself:
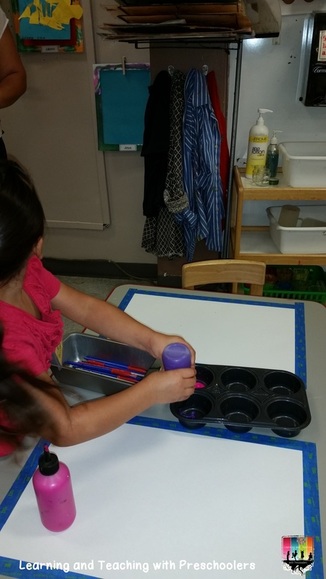
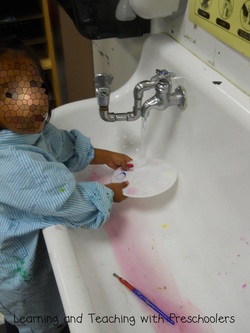
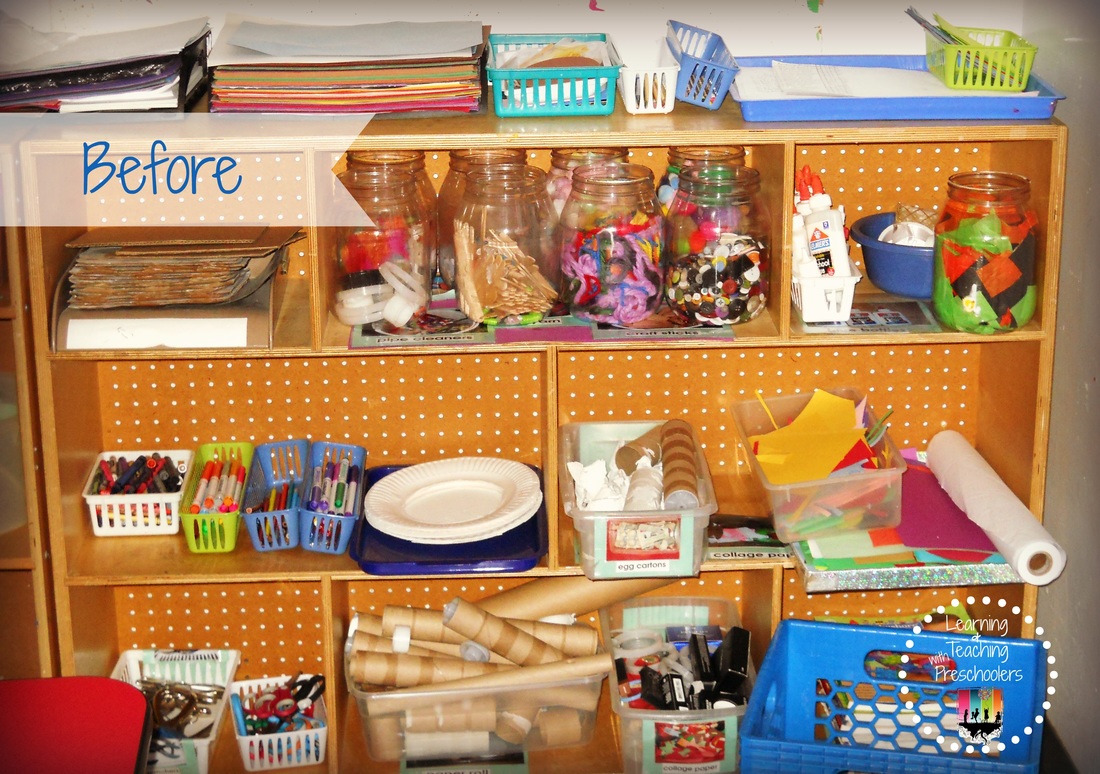 I’m almost embarrassed to let you see this picture but this was the starting point of my classroom transformation. Identifying the problem In the art studio we had minimal storage for art supplies, children had a hard time finding items that they wanted to use, so they would get discouraged and avoid the area all together. Also we had a lack of space for children to use material uninterrupted. So since art is such a valuable tool for children to anchor their learning through we knew that this area needed to be fixed pronto. The Solution To created three different zones in our art studio that will allow children the opportunity to work with several art mediums all at the same time. To rework furniture allowing for more storage in the area. Here is what we did. We placed a small rectangle table on the far wall of the studio and hung a shelf above that to hold clay tools and supplies. Here two children can work together sculpting and creations with clay. 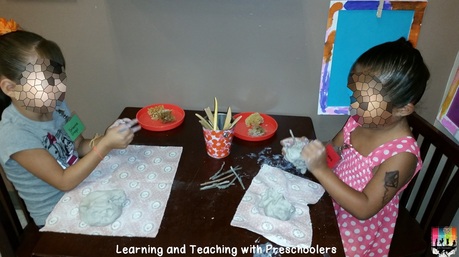 We placed a large rectangle table in the middle of the studio so that children could create with a wide range of art mediums at the same time. Allowing the children to work together and still have room to create. 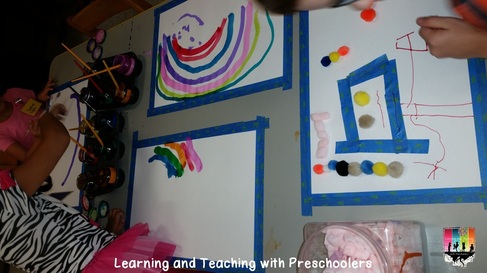 We placed another small rectangle table next to sink and dry rack that is used for painting projects. Children are encouraged to prepare their own paint trays for painting. Once they have finished their painting project they wash up the paint tray and paint brushes themselves.
Across from the table is two sections of storage shelves that houses a large variety of art supplies. All supplies are accessible at all times for the children to create with. 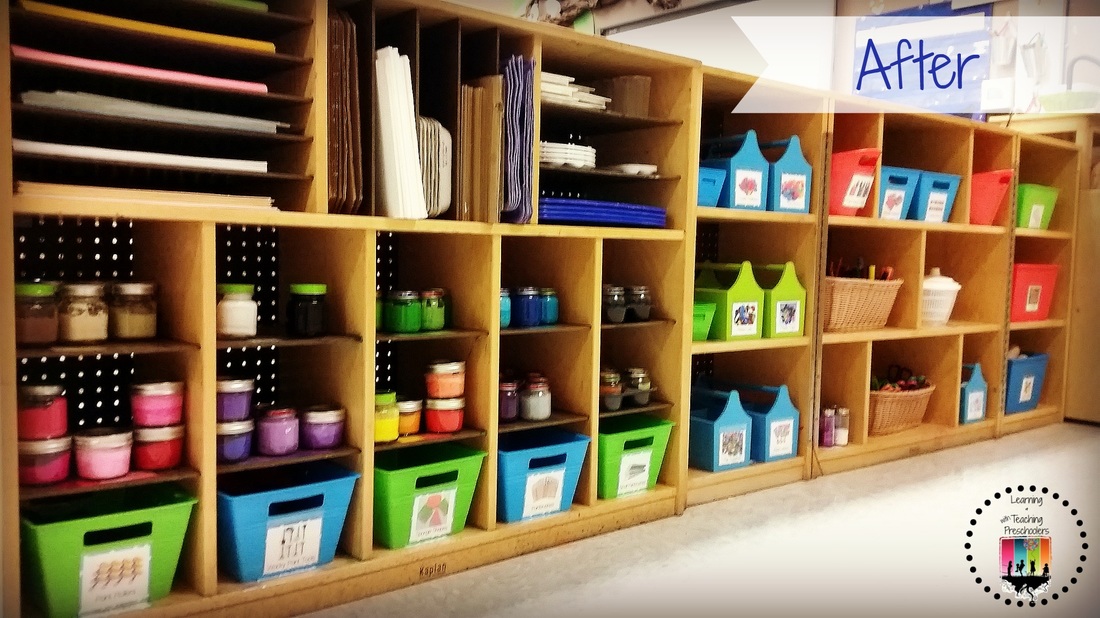 Now embrace the space that you have and work toward creating a dynamic space that reflects the people that live and play in it. You can’t create your perfect classroom in a day or a week, but you can create a perfect learning space one learning space at a time. Lets work together to create spaces that are worthy of miracles for our children. 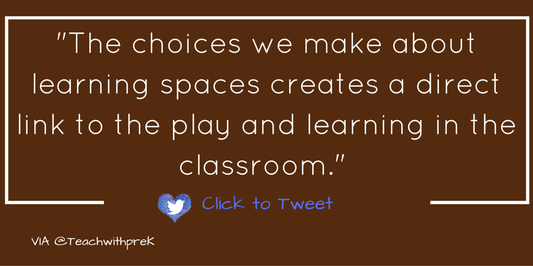 Task:
 If your new here, start here. 
|


Welcome!I'm Tami Sanders creator of Learning and Teaching with Preschoolers, a blog to help teachers create magical moments for the young. Follow Me

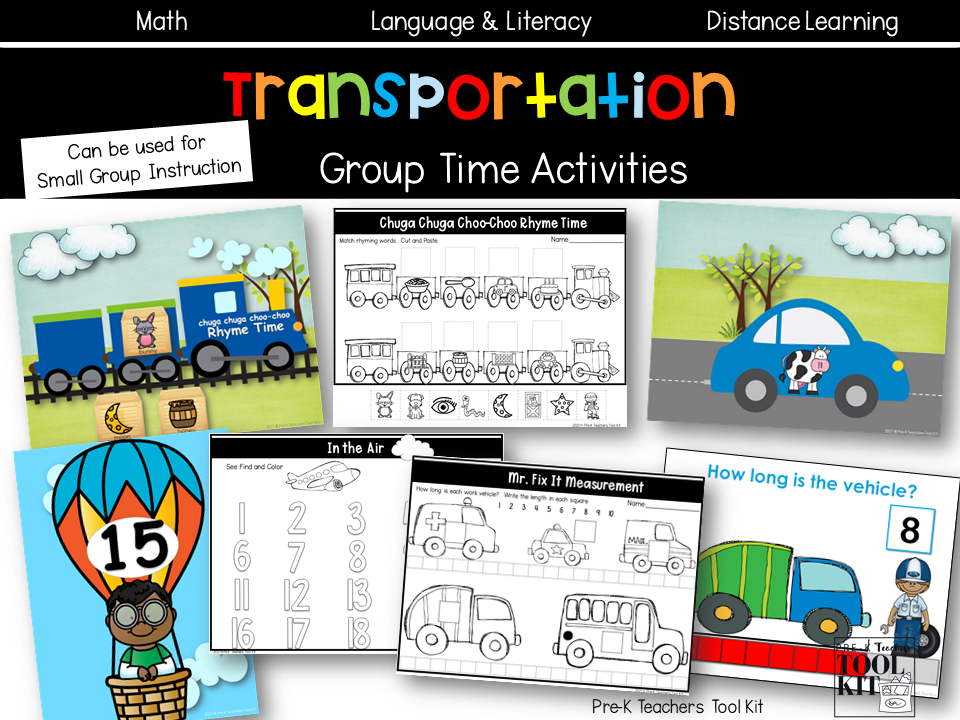
Circle Time Activities
Become a Member
Archives
August 2023
|
|||||||||||||||||||||||||||